The ambassadors feature can be used to send and receive discounts for a selection of events.

This feature comes with an invitation page where selected visitors, like your employees (or visitors with any other visitor tag, like your 'friends') can invite their colleagues, friends, family members or other relations to buy tickets with a discount for any collection of events.
The invite will result in an e-mail and the discount will automatically be active when the receiver of the e-mail follows the link to your special discount page. On the discount page, a fine selection of events can be shown, including the discounts on ticket prices, so it is directly clear what the ticket prices will be for all the events.
The receiver of the invite doesn’t have to be known or have an account on your website. The discount is also valid for visitors that are completely new and are creating an account for the first time while ordering the event(s) with the discount price.
A reporting tool provides insight into who sent which invite, and to whom. It also shows whether a discount invitation is still valid, and if orders were finalised while using the discount.
Setting up an ambassador campaign
To set up a campaign you can follow 5 easy steps:
Set up a discount price scheme for all eligible events in your box-office
Create a new discount code in the discount code module
Create a theme with all the events that are eligible for the discount
Create a landing page
Create an invitation page
1. Set up a discount price scheme for all eligible events in your box-office
Peppered discounts are based on special price types, so in order to unlock the discount price, a special price type needs to be added to events in your box-office system. Once the price type is created and added to all eligible events, click 'update prices' in the Events module, and check if the new prices are imported to Peppered. Make sure the new price type visibility is set to 'conditional' in the Price Types module (if it is a brand new price type, this will automatically be the case). Now you have completed the first step!
2. Create a new discount code in the Discount Codes module
To unlock this special discount price type, you create a new discount code in the Discount Codes module. Give it a recognisable name (for reporting) and select the discount price type that you want to unlock in this campaign (see step 1). If you don’t want the discount to be valid for all your events, select the eligible events in the select box (this also makes sure that the default discount code field, which pops up in the order process, is not shown while ordering any other event outside the discount event selection).
It is worth mentioning that the discount code you created also works in the 'regular' way. You can enter the code during the order process to get the same discount manually, but for this campaign that will not be used, since the discount will automatically be activated after the invite. Should a visitor encounter any issues, just give them the regular code to fill in during the order process.
You can find additional information in the 'Discount codes' knowledge base article.
3. Create a theme with all the events that are eligible for the discount
Once you have made your discount price type and the discount code to trigger the price type, you might want to show the special collection of events and their discount prices somewhere on your website. To do that, you need a theme to group your events. Create a theme (type: events) and select all events to group them in the theme.
If you don’t want this theme to be visible on the rest of the website, don’t put the theme in a visible theme group, and also set 'Show in production sidebar' to 'no' (leave 'visible' on 'yes' or it will not be visible, even on your special page).
4. Create a landing page
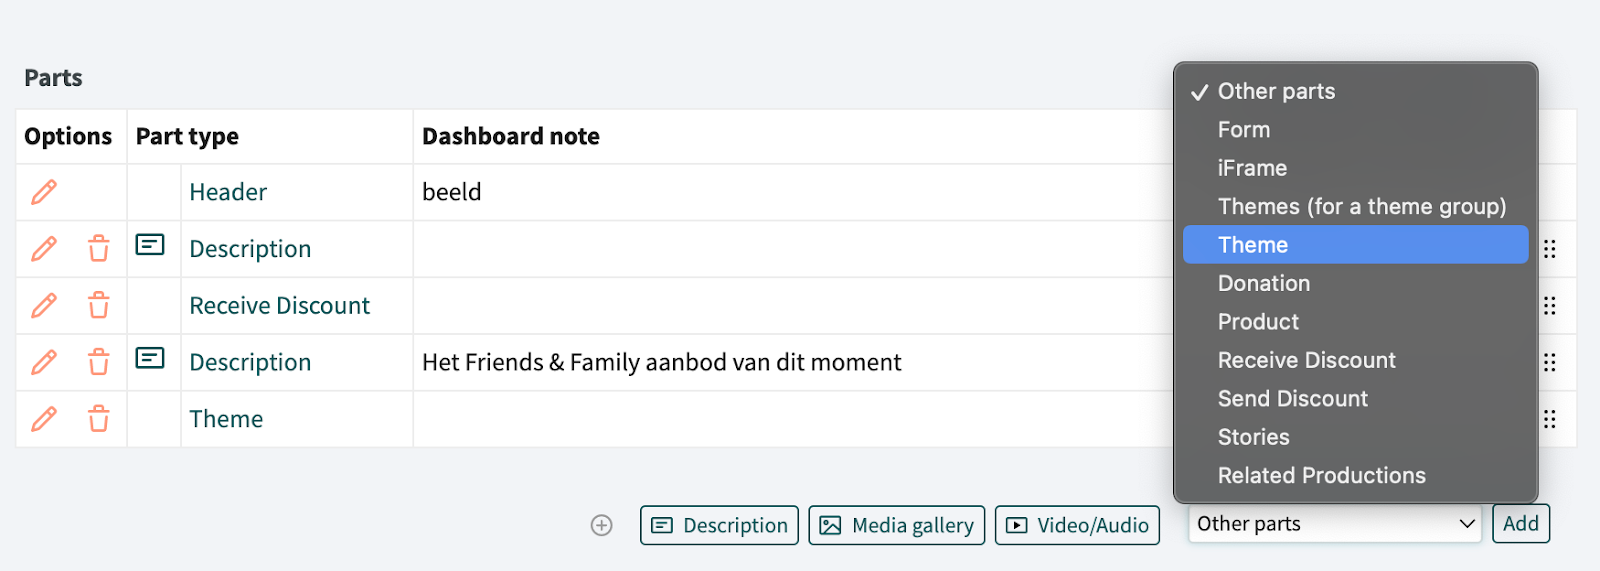
Now you can create a landing page that is shown to everyone that has accepted the invite email. The landing page is a regular page, and you can use all familiar page parts to add your content to the page. But we have created some special parts that are essential to add here:
The 'Receive Discount' part: add this part to the page to validate the discount link in the invite e-mail.
The 'Receive Discount' part validates discount codes. This can be done by either filling in a discount code in the form manually, or it can validate the discount automatically for the rest of your web session. By accepting the invite in the email, the discount code is activated automatically in the background when the page is opened. The visitor can directly order the events with the discount price.


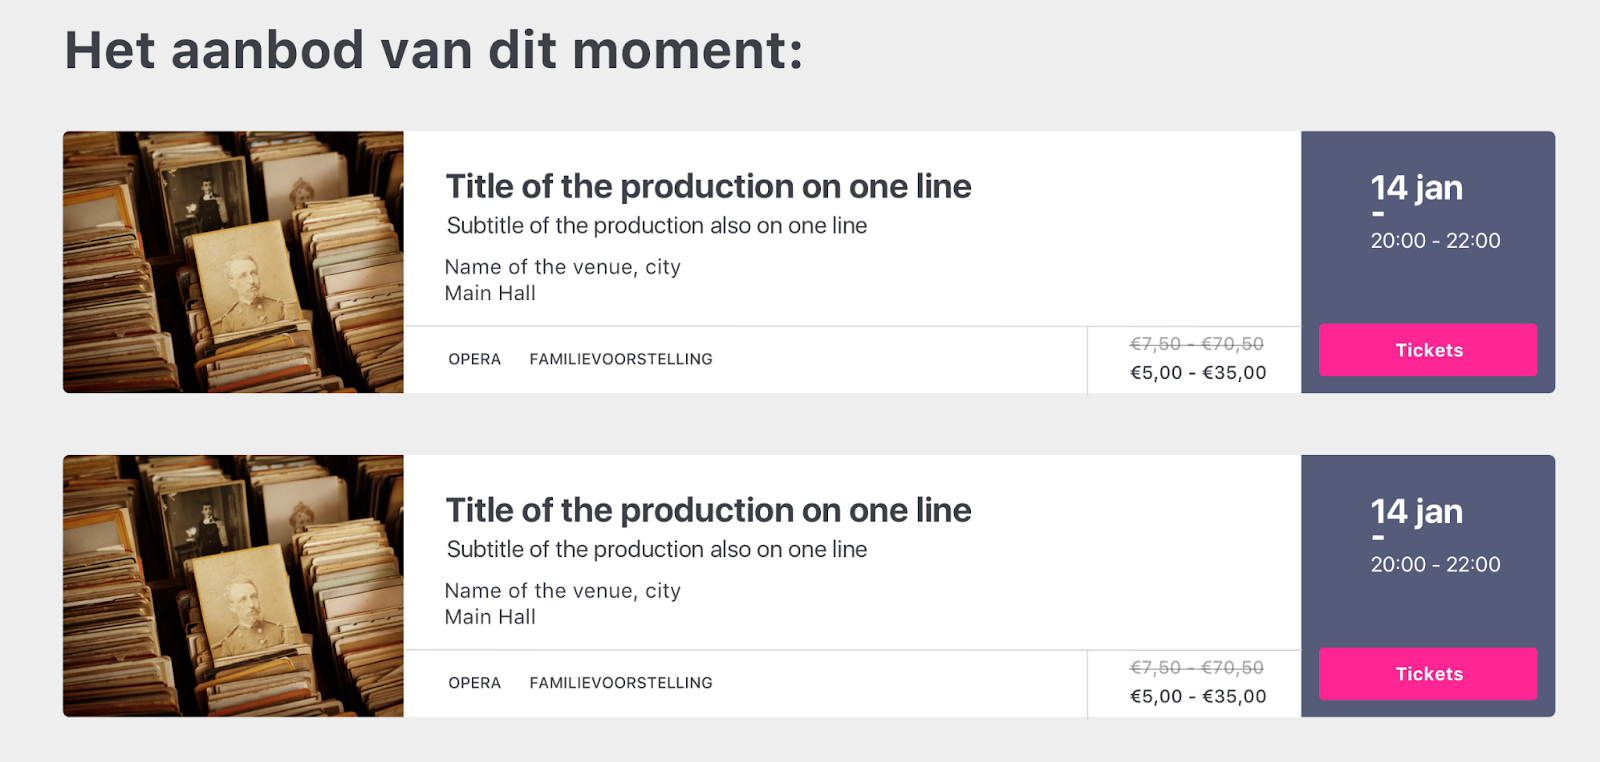
The second new feature you can use here is the discount price display option in the 'Theme' part. This feature displays the discount price for all events in the theme instead of the regular price, so you can immediately see the discount without having to start an order first. Add the event(s) you like to your shopping cart, and continue to the checkout to obtain your lovely discounted tickets.

To set up this part, select the 'Theme' part in your landing page. Within the part settings, choose the theme you set up in step 3, and also choose the discount code you set up in step 2. This tells the Theme part which discount price type needs to be displayed in the theme list.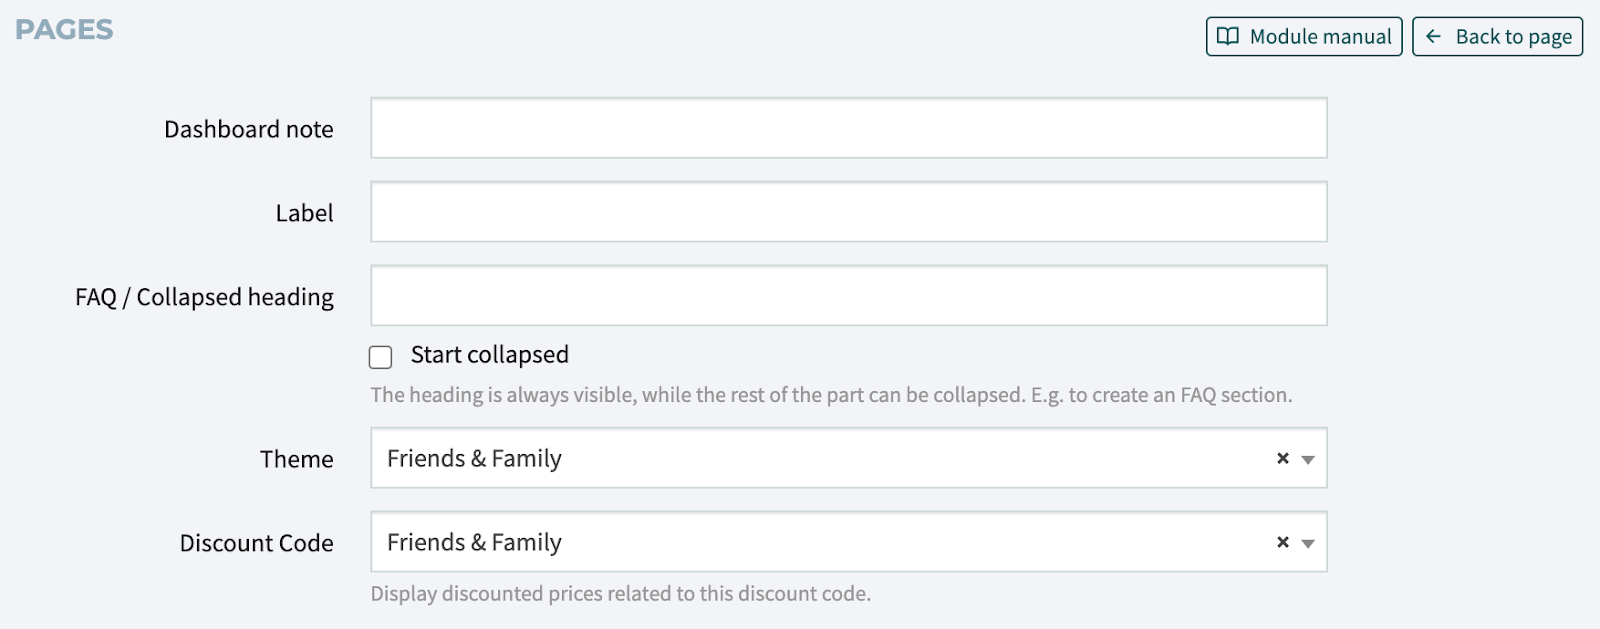
5. Create an invitation page
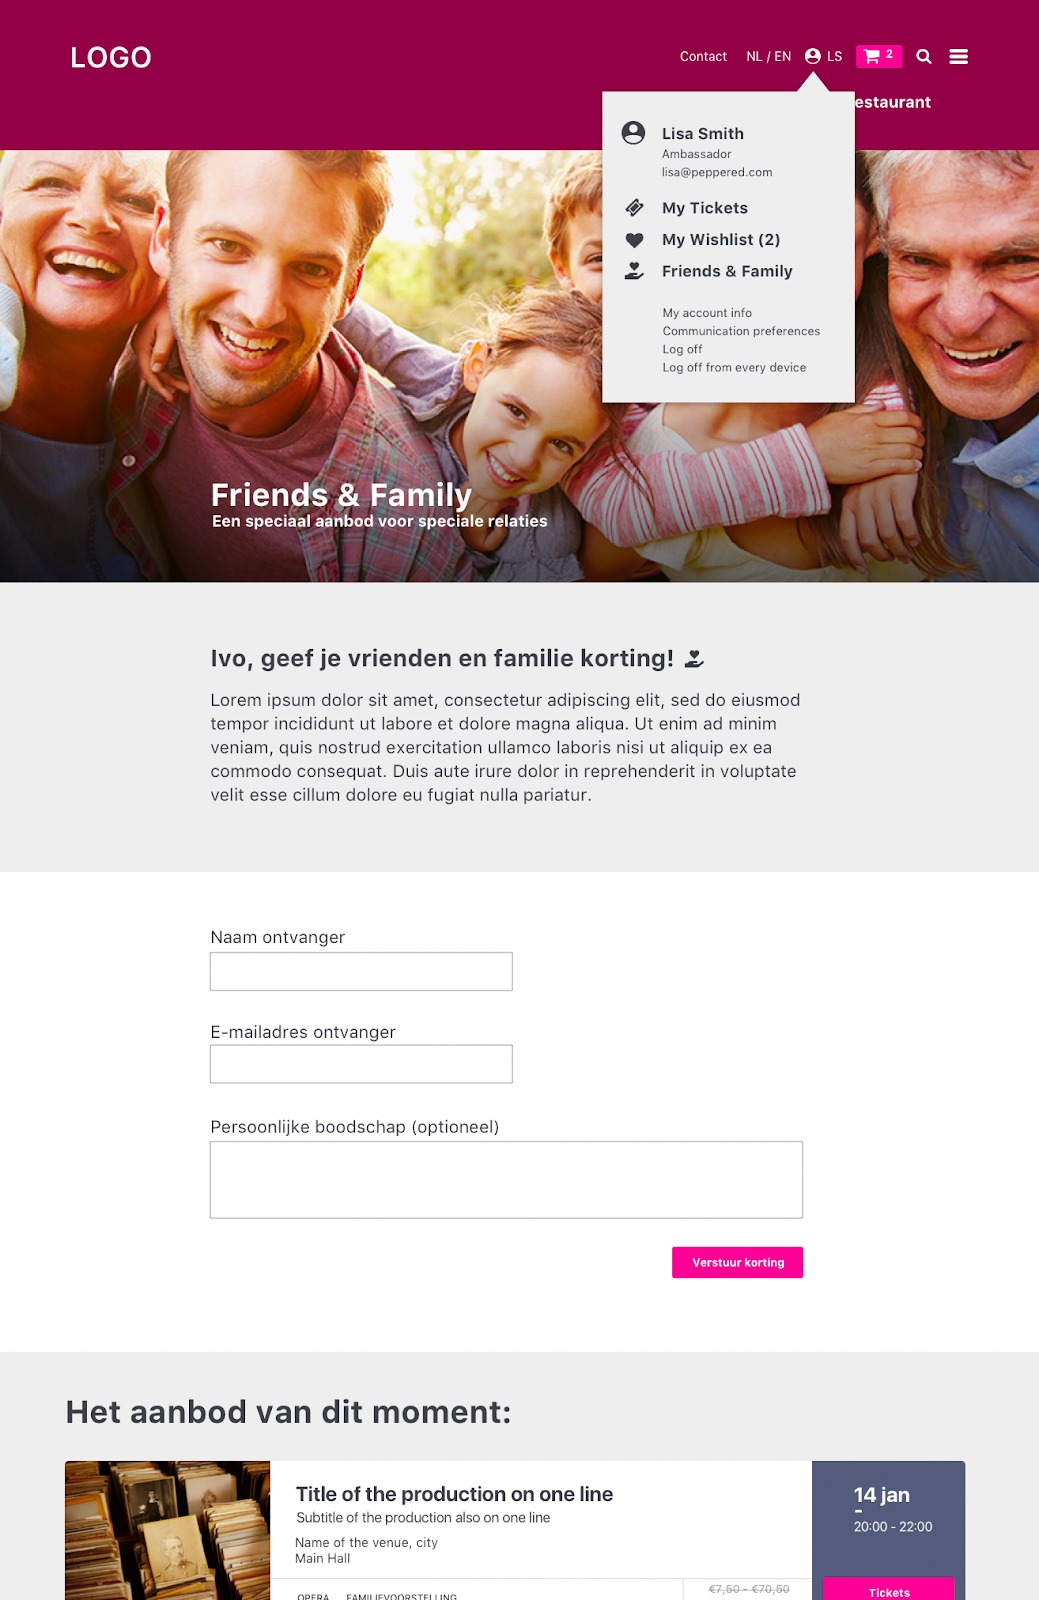
In order to use the landing page, a visitor needs to be invited. So you also need to create a nice invitation page for your ambassadors so they can start sending out the invites.
The invitation page is a regular page, and you can use all familiar page parts to add your content to the page. But we have created some special parts that are essential here:
The 'Send Discount' part: add this part to the page so your ambassadors can send invites to their relations. The part contains a form to send a personal invite resulting in an email to the receiver.

The email is already styled in your own branding. It contains a personal message and a button to activate the discount on the website.
To set up the invite form, just select the 'Send Discount' part on your invite page in the Dashboard.
Then open the part and select the discount code that needs to be activated when an invite is accepted (see step 2).
Also fill in the URL of the landing page (see step 4) that the receiver of the invite will see once the invite is accepted.

The second new feature you can use here is the previously mentioned discount price display option in the Theme part (see step 4). When using this option, people that have access to your invite page can already preview which events are eligible for a discount, so they can decide who to invite, based on the event collection.
After creating the invite page, make sure only your ambassadors can access the invite page. You do not want everybody to have access to this page, because it gives you the power to send out discounts. Hide the page by using visitor tags that only the accounts of your ambassadors have. Because your ambassadors need to be logged in (in order to register who sends which invites) we recommend the page to be placed in the 'My Account' menu, so it will only pop-up in the personal menu once you are logged in.

Now you are all set! Go inform your ambassadors and get them started on sending out invites to all their relations.
Good to know
All sent discounts are valid for 24 hours, starting when the receiver accepts the invite. This can be changed, but you need to contact a Peppered Expert to do so.
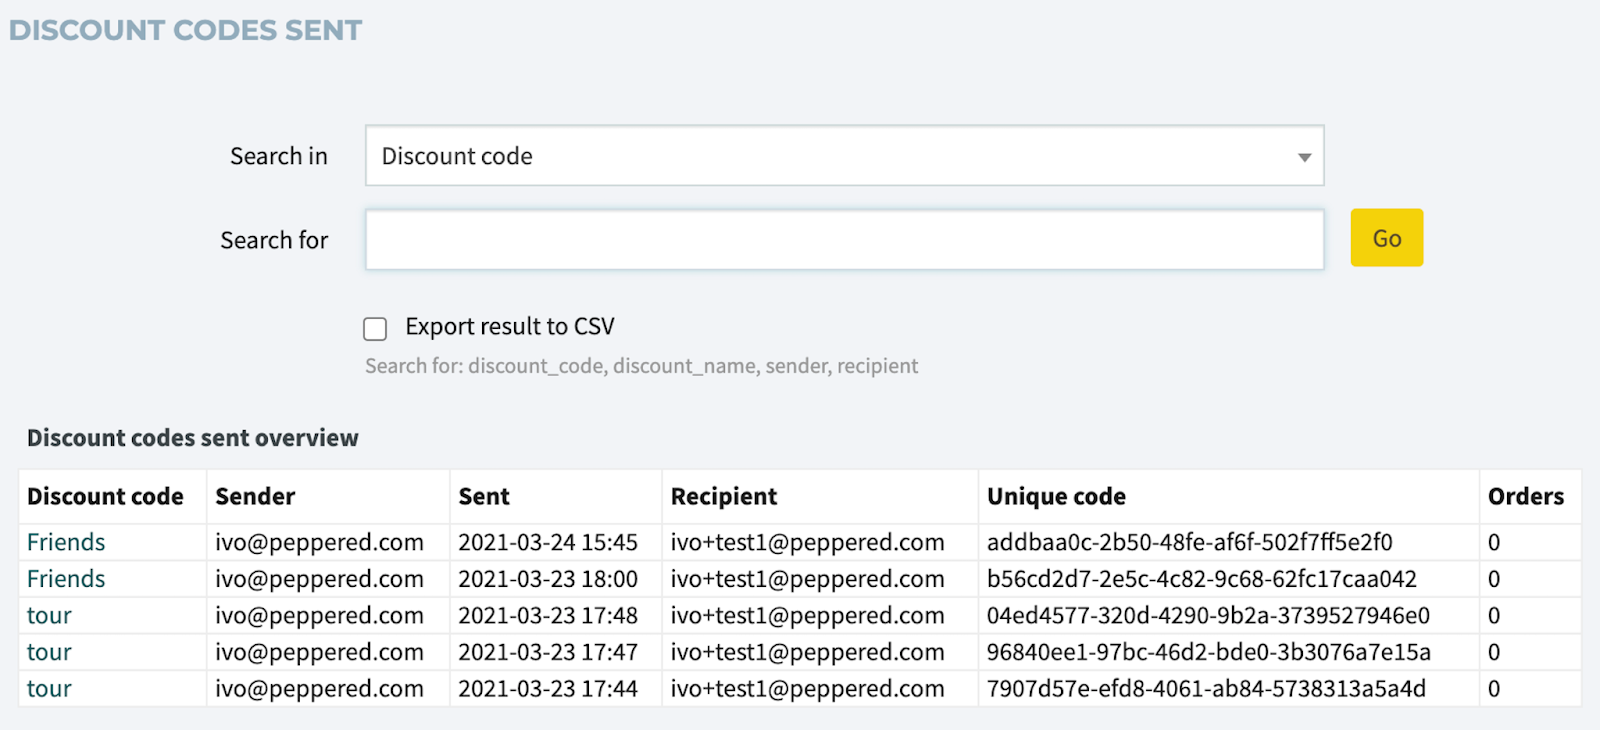
All sent invites will be collected in the brand new 'Discount Codes Sent' module in your Dashboard. This module provides an overview of what discount codes are used, who sent the invites (and to whom), and if an order has been placed with the discount. You can export a list to .csv and find out who your greatest ambassadors are. The recipients' email addresses are automatically anonymised after a while for privacy purposes.
The 'Receive Discount' part can also be used as a stand alone feature for any regular discount code. So you can create a landing page for any discount campaign. Just add the part to a page, and when communicating a discount code, use the URL of the landing page (tip: use a short URL in the 'Short URLs' module). For instance: "Go to www.theater.com/action and enter the code 'ACTION' for a special discount."
You cal also embed the discount code in a url in your newsletter, so it gets validated automatically when opening the page. Just add ?discountcode=XXXXXX (substitute XXXXXX with your discount code) after the page url.
